If you want to add fonts to your system and you are not hosting on your own servers, you have to send us the following files in the ticket system:
FONT.ttf
FONT.woff
FONT.otf

After you receive feedback from us about a successful installation, you need to add the font file name to the backend by clicking "Create". Please make sure that you always send the files to CloudLab first (and get feedback) before adding them to the backend.
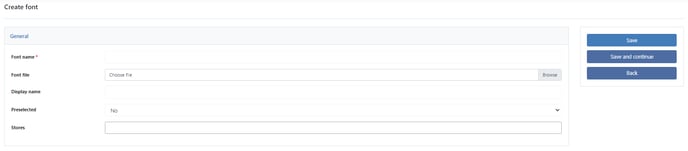
Font name
Here you enter the exact name of the font.
Font
Here you upload the .woff file (only needed if you have your own hosting).
Display name
Here you set under which name the font should be displayed.
Preselected
Here you can decide if this color should be pre-selected in new templates.
Stores
Here you decide whether the color is only visible for a specific store view within the data center.